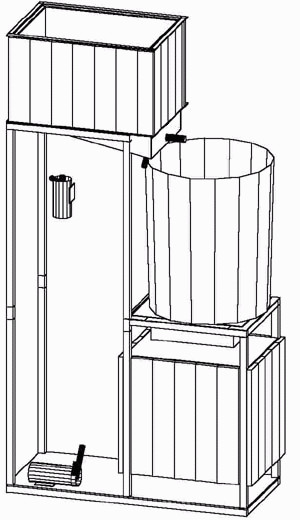
(work in progress)
Three tier stainless 20 gallon brewery
| The Mash Tun |  |
| Brewery stand | |
| Hot Liquor Tank | |
| Boil Kettle, Hopback and Cooling | |
| Control Panel | |
| Computer Control and data acquisition (work in progress) | |
| Grain Mill | |
| Draught Beer Cooler | |
| Software for Automation (work in progress) |
Whats New | Brewery | New Draught Board | Comments | Home
Thor's Homebrewery Overview
I wanted to build a brewery that would make the brewing day more fun. Fun to me means less of the elements I don’t like and more control of the brewing process. I had already gone from extract brewing to all grain and gone from enamel pots to converted kegs so I knew what I liked and what I didn’t. Namely,
| I didn’t want to move hot containers, |
| I can’t be to tall to work with. |
| it had to be easily stored when not in use (wife’s requirement), |
| had to be stable and safe, |
| I wanted to knock out 15 gallons with a large mash capacity, |
| I wanted to be able to do step mashes, |
| I wanted to have convenient temp measurements, |
| easy to control from a central location away from heat, |
| easy to clean, |
| no rust. |
The last requirement (or wish) would have to take me to stainless equipment. That in itself was going to be a challenge. I solved the problem by doing the work myself because there was no way my significant other was going to allow the cost associated with having a TIG welder assemble this thing. So I went to my local community college and took TIG welding for about 1.5 years. The instructor’s were nice enough to let me fabricate parts of the brewery onsite which was very helpful since I couldn’t afford a shear or a break for 10 gauge stainless. After it was built, I would think of other things I wanted but that’s another story (Frankensteins Monster rev 2).
But back to the design. I order to not move hot containers, it would have to have an integrated stand (made of stainless tubing of course) to hold all of the containers. Since I have built a stand before, I knew that a traditional three tiered brewery of 15 gallons would be tall and not all the stable. So instead, I figured on putting the Hot Liquor Tank (HLT) on the bottom and pumping the liquid up to the top. I wouldn’t bother with heating it directly but instead I would heat water in the boiler and drop it into the HLT. For sparging, I would use a pump to bring to the Mash tun and let gravity work from there.
As far as the Mash tun, I wanted to try something way different. I went with a rectangular container with a slopped bottom and a false bottom screen. I wanted to be able to raise the temperature by direct fire under the mash tun where a reservoir of liquid could be heated and recirculated to the top to even out the heat in the vessel. Even if this didn’t work they way I hoped, I could always direct fire the mash for Single Step infusion and then kill the enzymes for mash out this way.
For central control and temperature measurements, I would build a control panel into the system and use a LCD display to show the temp in various stages of the brewery. The circuit I used for this was designed by Ken Schwartz via his Web page on Electronic Thermometers ( ). I was also lucky enough to have him help me work out the bugs on the circuit when it didn’t quite work they way I wanted. The control panel also has controls for propane Ignitors for the burners, switches for the pumps and a switch for the grain mill.
In order to heat all this stuff, I would have to resort to propane to get it to heat in a reasonable length of time.
| Overview | The Mash Tun | Brewery stand | Hot Liquor Tank | Boil Kettle, Hopback and Cooling |
| Control Panel | Computer Control and data acquisition | Grain Mill | Draught Beer Cooler | HOME |
Copyright 1997. No information contained in this document may be reproduced without express written consent of the author.
Last revised: December 12, 1997.