Mash tun part 2, Revisions
This article represents the second installment of my homebrewery building series. The main reason for putting this and subsequent articles together is to share my experiences with you the reader and help you in your own projects. In order not to make the article too long, I’ve had to trim some of the details such as exact dimensions and step by step methods of construction. If your really into the details of how-to or have questions, feel free to contact me. I don’t represent this as the best small brewery; just the one I myself designed and why.
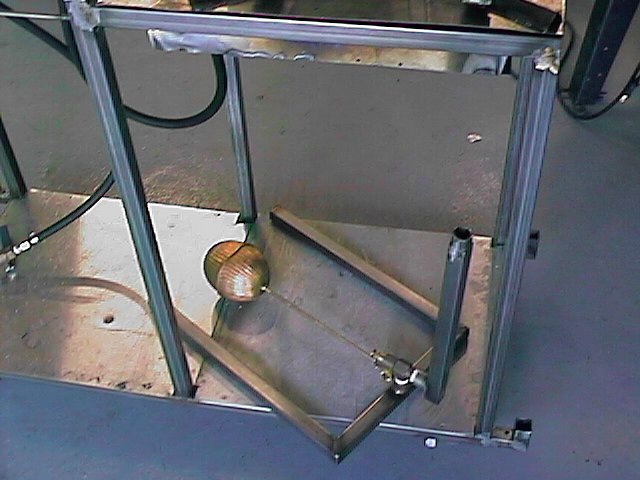
Sparge Manifold
One of the most important elements to change in my mashing setup was the sparge system. I have always hated to keep an eye on the water level during the sparge to make sure it wasn’t too high or low. After an initial try with my conventional setup of controlling the sparge rate manually, I figured it was time to move on to an automatic sparge setup. The basic design idea came from Bob Jones, a Draughtboard member, who uses a float valve in his system.
Construction material.
It seemed easiest to use the material I already had around from previous projects so I choose some 1x1" stainless steel tubing I used for my brewery stand. This tubing is fairly clean, easy to work with and isn’t all that expensive at about $1.95 a foot from Reliance Metalcenters. I also picked up some ½" half couples from Duhig for a couples of bucks so I could connected it up to my pump system and the float valve. As far as the float valve itself goes, I took Bob’s suggestion and bought one from Grainger made out of brass. The valve and float cost under twenty bucks whereas equivalent in stainless would have been hundreds of dollars more.
Design
My normal method of sparging the grain was to let the hot water drip slowly over the grain bed keeping about an inch of water over the grains. One problem with this is that the temperature seems to drop a lot from the Hot liquor tank to the grain bed surface. Bob Jones suggested that the the hot water passing through the air causes the temperature loss. Bob solution was to actually sparge with the manifold submersed to avoid cooling. I wanted my design to be able to adapt either method and also be able to adjust to varying amounts of grain in the mash tun. I also wanted to be able to move the sparge head out of the way during the initial part of the recirculation so it doesn’t interfere with the grain bed.
The final design I adopted was U shaped manifold with a neck made of square tubing so that it could be easily clamped. The float valve itself has an adjustment screw so that you can vary the water level relative to the valve. By varying the float valve arm and the height of the manifold itself, I can easily achieve either sparge method.
| The Mash Tun vessel | Sparge Manifold | Recirculation Manifold | Mash Lid | Insulation | HOME |